Wednesday, August 30, 2023
Tuesday, August 29, 2023
FIEA 3D Art Project #1: Rickrolling Nick with my first assignment
For the first week of our 3D Art classes at FIEA, we were expected to create 3D sprite Art using Maya and UE5 like the reference image provided.
im sorry
Monday, August 14, 2023
Image Editor made in Unity
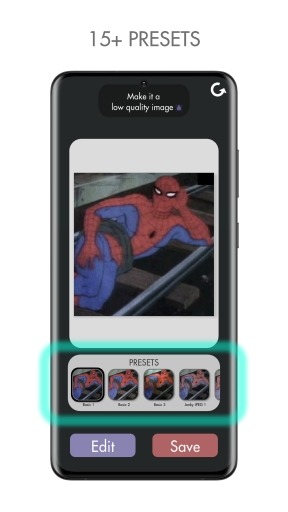
I was checking out some medium blogs to to learn some image manipulation to brush up some of my technical art skils. Them medium gods were actually pretty darn helpful and I somehow ended up developing a janky photo editor using Unity. It transforms any regular image into a “low-quality-meme”. I call it the “Low Res Meme Editor”. I’ll be discussing my approach towards developing the photo editor in this blog.
Janky Icon for a Janky Photo Editor The Editor UI
1.0 Preparing Images for Editing
The first step was transforming the images into a suitable format for easy manipulation. Texture2D felt appopriate for this purpose, as it gives me more control over the pixel data. I could directly manipulate pixel values using the GetPixel() and SetPixel() methods of any Texture2D object.
- So I created method that took an image an returned a Texture2D corresponding to it.
- Then I created an empty texture with the width and height of the image.
- Finally the pixels on the original image are mirrored on the pixels of the empty texture using the
SetPixels()method.
2.0 Image Editing Algorithms: Approach
I chose to work on a series of image editing techniques. My plan was to apply these algorithms with different settings, essentially creating pre-defined configurations for editing images. Most of these algorithms shall serve the sole purpose of giving the image a low-quality-meme look”.
2.1 Saturation Control
The first control I wished to establish was for Saturation i.e the intensity of the color of each pixel of the image.
- A saturation value of 0 makes the image grayscale.
- A value of 1 keeps the original colors unchanged.
- Anything above 1 makes the image more vibrant.
Algorithm for Saturation Control
So the basic algorithm I used to achieve saturation control was–
- Getting the texture from the image and creating an empty texture to assign the edits texture to.
originalTexture = GetTextureFromImage(image);
modifiedTexture = new Texture2D(originalTexture.width, originalTexture.height);- Looping through the pixels to access the HSV values from their color. The
saturationvalue is of importance here as we are going to alter it, so it is passed as a reference type.
// accessing the texture code here

Color[] pixels = originalTexture.GetPixels();
int totalPixels = pixels.Length;

for (int i = 0; i < totalPixels; i++)
{
    Color pixelColor = pixels[index];
    Color.RGBToHSV(pixelColor, out float hue, out float saturation, out float value);
}- Applying the saturation to each pixel. The
saturationvalue is multiplied by asaturationFactorto alter it. And finally a new array of Color of length the same as the original image is assigned the color with the newsaturationvalue.
Color[] modifiedPixels = new Color[totalPixels];

for (int i = 0; i < totalPixels; i++)
{
    // accessing HSV code here
    saturation *= _saturationFactor;
    modifiedPixels[index] = Color.HSVToRGB(hue, saturation, value);
2.2 Adding Gaussian Blur
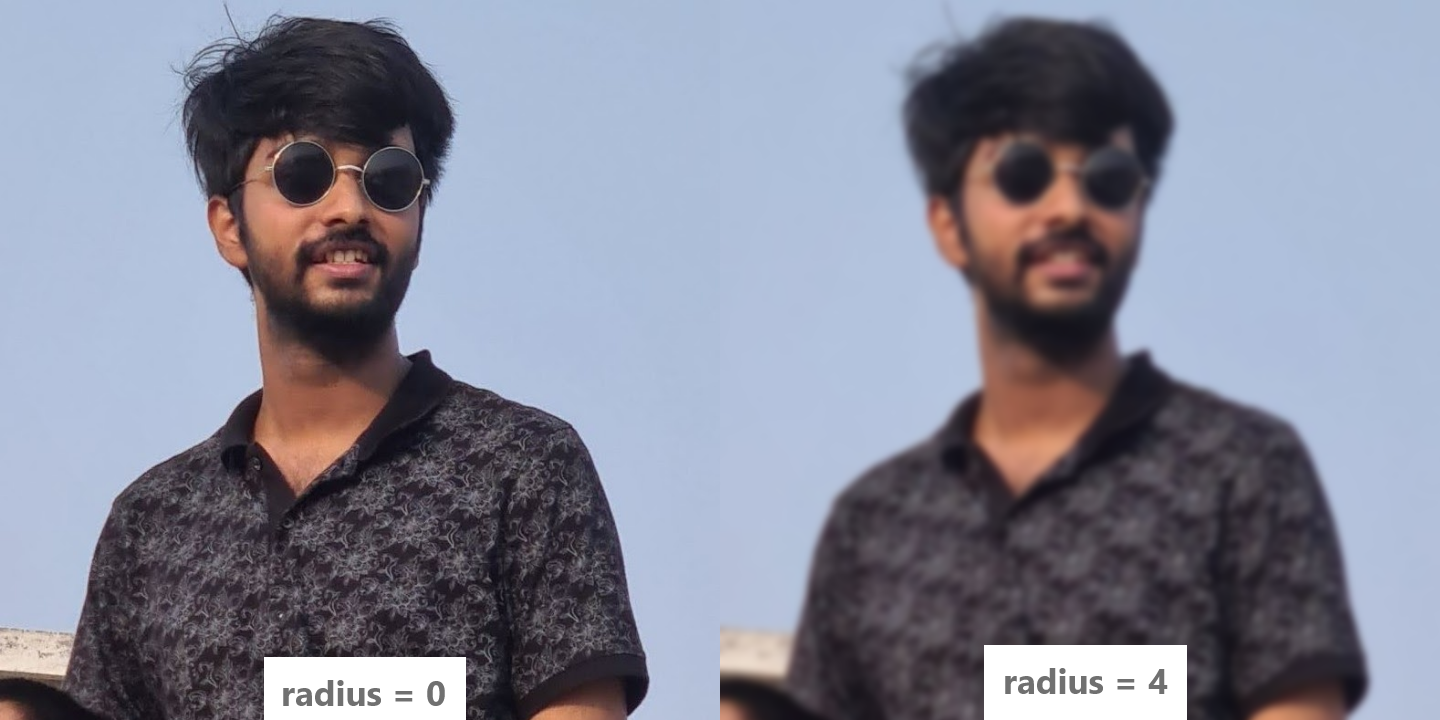
Next in the list are algorithms that helps blur an image using a Gaussian Function. This helps achieve the bokeh effect. It has the effect of reducing an image’s high frequency components and thus acting like a low-pass filter.
- Creating the Gaussian Kernel
- First we create a gaussian kernel of a given size and radius. The gaussian kernel is a float 2D matrix (
float[,]). Each element in the matrix is a weight that determines the contribution of each pixel to the blurring process. These weights are calculated based on the Gaussian distribution formula. - Input Parameters: The CreateGaussianKernel() method takes the radius and size of the kernel as the parameter and returns a 2D matrix (float[,]). The size represents the dimensions of the kernel, and the radius controls the spread of the blur effect.
private float[,] CreateGaussianKernel(int size, float radius) {}- Initialization: An empty 2D array called kernel of size x size is initialized. This array will store the weights that determine the strength of blurring for each pixel. The variable sigma is calculated as radius / 3f. sigma is a parameter that affects the spread of the Gaussian distribution. A larger sigma value results in a wider spread of the blur. The constant for the gaussian distribution is calculated as twice the sigma squared.
        float[,] kernel = new float[size, size];
        float sigma = radius / 3f;
        float twoSigmaSquare = 2f * sigma * sigma;
float totalWeight = 0f; - Gaussian and Total Weight Calculation: The nested loops iterate over each element of the kernel array. For each element at position [y, x], it calculates the squared distance from the center of the kernel. The formula x * x + y * y calculates the squared Euclidean distance. Using the squared distance, it calculates the weight using the formula Mathf.Exp(-distance / twoSigmaSquare). This weight is a measure of how much influence a pixel at that distance should have on the blurring process. The greater the distance, the smaller the weight. The calculated weight is assigned to the corresponding position in the kernel array. The totalWeight variable keeps track of the sum of all the weights in the kernel. This sum is used to normalize the kernel later.
        // intialization code here

        for (int y = -size / 2; y <= size / 2; y++) // -size / 2 to size / 2
        {
            for (int x = -size / 2; x <= size / 2; x++) // -size / 2 to size / 2
            {
                float distance = x * x + y * y;
                float weight = Mathf.Exp(-distance / twoSigmaSquare);
                kernel[y + size / 2, x + size / 2] = weight;
                totalWeight += weight;
            }
}- Kernel Normalization: After calculating all the weights, the kernel is normalized to ensure that the sum of all the weights equals 1. This step is essential to maintain the overall brightness of the image during blurring. The nested loops iterate over each element of the
kernelarray again. Each weight is divided by thetotalWeight, effectively scaling down the weights to ensure their sum equals 1. And then thekernelis returned.
        // intialization code here

        // weight calculation code here

        for (int y = 0; y < size; y++)
        {
            for (int x = 0; x < size; x++)
            {
                kernel[y, x] /= totalWeight;
            }
        }

return kernel;- Applying the Gaussian Kernel
- After calculating all the weights, the kernel is normalized to ensure that the sum of all the weights equals 1. This step is essential to maintain the overall brightness of the image during blurring. The nested loops iterate over each element of the
kernelarray again. Each weight is divided by thetotalWeight, effectively scaling down the weights to ensure their sum equals 1. And then thekernelis returned. - Input Parameters: The
ApplyKernel()method takes a Texture2D as input along with akernel,x,y(position within the image) andsizeof the kernel as the parameter. It then calculates and returns the weighted average of colors in the neighborhood around the (x, y) position using the provided Gaussian kernel.
private Color ApplyKernel(Texture2D texture, int x, int y, float[,] kernel, int size) {}- Input Parameters: The
ApplyKernel()method takes a Texture2D as input along with akernel,x,y(position within the image) andsizeof the kernel as the parameter. It then calculates and returns the weighted average of colors in the neighborhood around the (x, y) position using the provided Gaussian kernel.
        float r = 0f, g = 0f, b = 0f;
int halfSize = size / 2;- Looping through the Kernel: Nested for loops iterate over each cell in kernel. The outer j loop iterates over the rows of the kernel whereas the inner i loop iterates over its columns.
        for (int j = 0; j < size; j++)
        {
            for (int i = 0; i < size; i++)
            {

            }
}- Retrieving and Updating the color values of pixels The color values of pixels at calculated coordinates offsetX and offsetY are retrieved from the input texture. The RGB values intialized earlier are updated by adding the color values retrieved multiplied by the weight value from the Gaussian Kernel matrix from the i and j position. The final color obtained is returned.
        Color pixel = texture.GetPixel(offsetX, offsetY);
        float weight = kernel[j, i];

        r += pixel.r * weight;
        g += pixel.g * weight;
b += pixel.b * weight;- Applying the Gaussian Blur: Now we apply the gaussian blur to the image by calculating the kernel, processing the pixel and updating the image.
- Input Parameters: The ApplyGaussianBlur() method takes a Texture2D as input along with the radius of the Gaussian Blur needed (basically used as the size of the kernel) and returns the blurred texture.
private Texture2D ApplyGaussianBlur(Texture2D sourceTexture, float radius) {}- Calculating Kernel size and Kernel: The Kernel size is obtained by rounding the
radiusto the nearest integer, doubling it and then adding 1 to it, ensuring coverage of sufficient area around each pixel.
        int kernelSize = Mathf.RoundToInt(radius) * 2 + 1;
float[,] kernel = CreateGaussianKernel(kernelSize, radius);- Creating Blurred Texture: A new
blurredTexturewith same dimensions assourceTextureis initialized.
        Color[] pixels = sourceTexture.GetPixels();
Color[] blurredPixels = new Color[pixels.Length];- Iterating through pixels: A nested loop is used to access the pixels of the
sourceTexture. For each pixel at (x,y), theApplyKernel()function is called to calculate the new color of that pixel. The calculated blurrer color is stored in the corresponding position of theblurredPixelsarray.
        for (int y = 0; y < sourceTexture.height; y++)
        {
            for (int x = 0; x < sourceTexture.width; x++)
            {
                Color blurredColor = ApplyKernel(sourceTexture, x, y, kernel, kernelSize);
                blurredPixels[y * sourceTexture.width + x] = blurredColor;
            }
}- Applying Blurred pixels to the Texture: After processing all the pixels, the
blurredPixelsarray is assigned to theblurredTextureand it is returned.
        blurredTexture.SetPixels(blurredPixels);
        blurredTexture.Apply();

return blurredTexture;- Blurred Sprite: A sprite is created from the blurred texture and is applied to the image.
        Sprite blurredSprite = Sprite.Create(blurredTexture,
                                    new Rect(0, 0, blurredTexture.width, blurredTexture.height),
                                    new Vector2(0.5f, 0.5f));
        image.sprite = blurredSprite;
Subscribe to:
Comments (Atom)
Popuular Posts
-
Shakespeare does meme review!
-
My primary focus was on enhancing the visual aesthetics of the scene through lighting and post-processing effects to give it a blue underwat...
-
This week I did a final pass on the lighting by simulating fake lighting using emissive materials. I created a blueprint to open and close ...
-
Our extension finally implemented in Audio2Face and all the bugs have been fixed. For implementation in Audio2Face we had to: Make changes ...
-
I did a remote internship with people from FIEA last summer before actually joining its Master's program. I assisted the very talented ...
-
Portfolio Website Link - https://makra.wtf/ Resume - https://makra.wtf/assets/pdf/AR_Resume.pdf Demo Reel - https://youtu.be/_ZN0FYJHpHg
-
Switched to a standalone executable that anyone can run of their system without even Omniverse to help fix the Omniverse dependencies. You ...


.png)


